

1.) Plaster of Paris. This shit is amazing. I have had SO much fun with it over the years, and always have it on hand. If you don't, you can pick it up at your local craft store! There are instructions on how to use on the box, but it's 1/1 ratio plaster & water. (use cold water!)
2.) Get your muffin tray ready. I used aluminum foil cups, the paper one's stuck to the plaster and pissed me off. :( Once your plaster is all mixed up like 311, pour into cupcake cups. I filled pretty much to the top.
3.) Go check your facebook or check out www.attackofthecraft.com while your plaster is curing. Takes about 30 minutes to initially set, before you can remove the wrappers.

TIP: If you are impatient like me, you can bake these at about 350 for an hour or so to dry them so you can move onto the next step instead of waiting 5 days for mother nature to do her thing...
They must be completely dry before doing any painting or your hard work will just fall off. :(
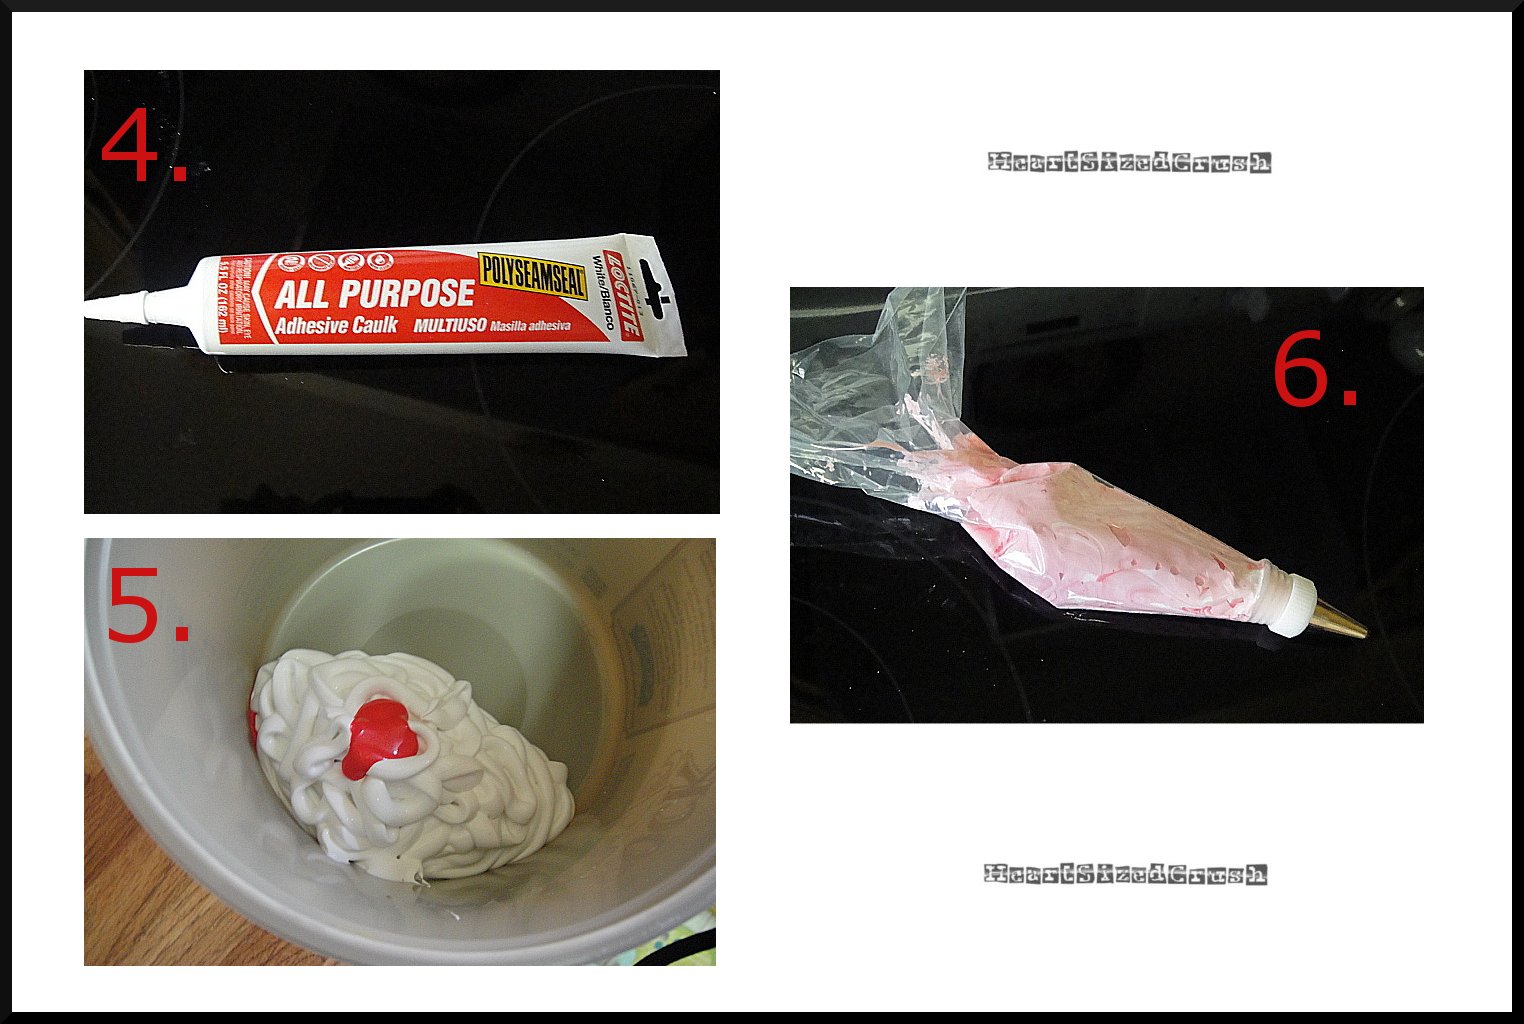
4. Now...onto the frosting. For this we use caulk. ...and if you're a perv like me, there are a million jokes just waiting to be told right now. :D Make sure you get a water based caulk for easy clean up!
5. Get a bowl/bucket/whatever and any old acrylic paint. The paint is used to color your frosting. If you want plain white, obviously skip this part. :D MIX WELL!
6. I also used to be big into cake decorating, so I just happened to have this stuff on hand. I used disposable decorating bags because I did not want to reuse they. (gross!) You can use any piping tips, or none at all. It just depends on how fancy you want to get! Again, these are available at most craft or specialty stores! So once your con-caulk-tion s ready load it into your piping bag! (you might need a little help...it's messy!)

7.) Pretty easy step here- just get your bases ready and your work space covered and plenty of napkins within arms reach!
8.) I'm sure at this point you are like WTF? Here's the story- I decorated 2 cupcakes and found that the frosting' just didn't sit high enough. If I used more 'frosting' it got to heavy and fell. SO- I just happened to have some plaster brains left from a long ago project, so I placed a brain in the center of the rest, for added bulk.
9. See, can you see where I'm going. Besides- a cupcake with a brain inside it is just A-W-E-S-O-M-E! If you don't happen to have any brains laying around- I'm sure you could think of something to use in it's place. ? maybe ? :D
10. These are 3 of the finished cupcakes. Note the difference between cupcakes with brains, and cupcakes without!
Now you can decorate these however. I used cute little skull and crossbones plastics I had laying around, GLITTER!, I did use some real ball sprinkles but I found they bled into the 'frosting'. Just gt creative and have fun! I plan on sealing these with an acrylic sealer as well, so I don't have GLITTER! everywhere!
These next 2 are my favorite! I used red beads & red glitter on this one. I do recommend painting your bases prior to caulking- would have been much easier!

And this pretty girl is total sweetness! I LOVE how she turned out! Good enuff to eat! :)

So I think I pretty much covered all the steps. I hope you enjoyed my first ever tutorial! ..and I'm really sorry if you get super mad dog cravings for cupcakes after this! If you decide to try this out- please share so we can see!
Also- don't forget to check out HeartSizedCrush HERE. <3 -Karla


Oh my goodness!! These are amazing, Karla! Now I want to have cupcakes, damn it!!
ReplyDeleteLove this! What a fun crafty-craft!
ReplyDeletehaha brilliant! Yet more things for me to try :-D Thanks for the tut, Karla!
ReplyDeleteThis might be the most awesome tutorial ever!
ReplyDeleteThis is mad awesome. I love plaster of paris! This would be super fun to do at a girl's party. :D
ReplyDeletethis is awesome!
ReplyDeletehey, you, gorgeous girl... God blessa youse -Fr.Sarducci, ol SNL
ReplyDeletehi..nice blog
ReplyDeletethanks for the tutorial.. love this!!